Custom home visualisation timeline: From concept to completion
Introduction
Architectural visualisation turns design ideas into convincing visual communication. It’s important for developers, architects, and structural engineers that build custom homes to know how long it will take to create visualisations. This is important for planning the project, coordinating marketing, and managing stakeholders.
For developers, architects, and structural engineers, visualizing a custom home is an important stage that turns design ideas into convincing, useful images. When practitioners in the field know how long architectural visualisation usually takes, they can better manage client expectations, project timelines, and collaboration between different fields. Specific homes need specific visualisation methods, unlike typical residential constructions. Each property has its own architectural style, site conditions, and client expectations that affect manufacturing timetables in a direct way. This guide makes the visualisation process easier to understand by breaking it down into steps with realistic timescales that fit with how professionals in the AEC field work.
Estimating a timeframe accurately keeps schedule issues from costing a lot of money. When developers plan marketing launches, planning submissions, or presale campaigns around visualisation deliverables, it is very important for them to know how long it will really take to make things.
Project kick-off & data gathering
A full kick-off is the first step in a successful visualisation project. If all the inputs are ready ahead of time, it usually takes 2 to 5 business days.
The first step to good visualisation is to gather all the data you need. The visualisation team needs architectural drawings (plans, elevations, sections), material specifications, landscape designs, and photos or survey data of the site. For custom homes, this stage generally includes concept sketches, mood boards, and reference images that show design intent in addition to technical paperwork.
Important information includes the exact topography of the site, the context of the surrounding area (for realistic shadows and sightlines), the materials that have been accepted, and the color palettes that have been approved. Structural engineers should include any unique engineering aspects that affect the visual composition, such as cantilevered elements, exposed steel, or unique structural systems.
This step also sets the project’s scope, including how many camera angles there will be, whether the focus will be on the inside or outside, what kind of lighting will be used (day, dusk, or night), and whether animation or still photos are needed. Clearly defining the scope keeps the timeframe from slipping during production.
Consolidated information packets are good for developers. Giving BIM models, material libraries, and full specifications up front cuts down on back-and-forth questions that slow down schedules. One big briefing meeting is typically more effective than sending out several smaller pieces of information.
Conceptual modelling
The visualisation team uses the plans and elevations that are given to them to make precise massing and key spatial forms. The first shapes are made and the fundamental camera angles are set. A normal bespoke home usually takes 2 to 4 days to build.
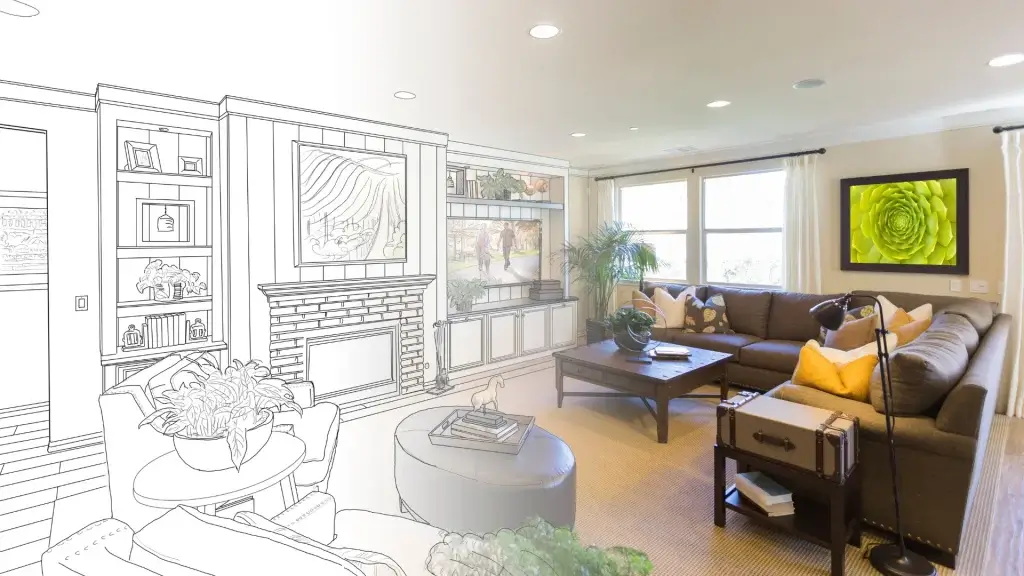
Conceptual modeling lays the groundwork for the geometry of the visualisation. Artists use reference materials to build the fundamental shape of the building, the site setting, and the main masses. In this stage, accuracy is more important than detail. The right proportions, spatial relationships, and overall composition are more important than the quality of the materials.
For custom homes with complicated shapes, including curving walls, non-orthogonal layouts, or complicated roof shapes, the modeling time is longer. Artists check the dimensions against architectural drawings and mark any inconsistencies or ambiguities in the paperwork that need to be fixed.
Topography, existing plants, and nearby buildings that change the visual context are all part of site modeling. Accurate terrain modeling is very critical for sloping locations where the home’s relationship to the landscape has a big effect on how it looks.
At the end of this phase, there will be test renderings from suggested camera angles that are low-resolution. Before detailed modeling starts, developers and architects look over the composition, framing, and focus points. Getting clearance early stops people from wasting time on fine details that aren’t needed.
Design detailing
After the base model is approved, all the architectural details, finishes, fittings, and landscaping are incorporated. In this step, basic shapes are turned into realistic surroundings using material schedules and interior choices as guides. It usually takes 5 to 14 days, depending on how much detail there is, how many slots there are, and how many review cycles are needed.
Detailed modeling turns abstract geometry into accurate architectural drawings. Artists contribute features like windows, articulation of the facade, external fixtures, landscape elements, and furniture for the site. The first step in assigning materials is to give timber cladding the right grain patterns, masonry the right mortar joints, and glazing the right reflection of the surrounding area.
Custom homes often include one-of-a-kind features that need to be modeled just for them, such unique balustrade designs, architectural screening, built-in plants, or one-of-a-kind entry features. Adding each new element takes more time to model, but it makes the visualisation much more realistic.
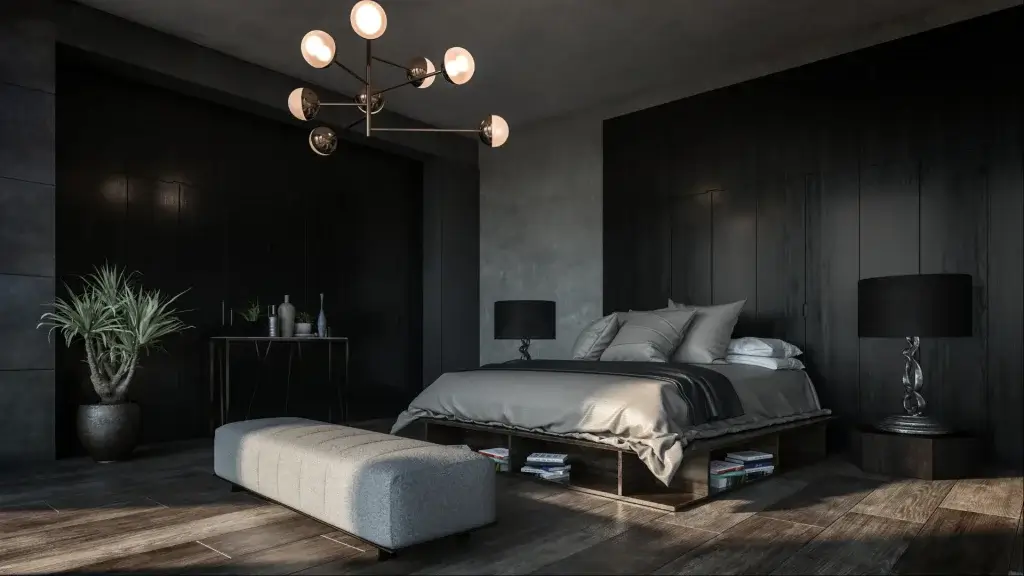
Interior visualisations need more intricacy. It is important to carefully coordinate the room layouts, woodwork details, fixture requirements, and style direction. The furniture, artwork, and other decorative items you choose must fit with the project’s target market. For example, contemporary minimalism needs a different style than coastal luxury.
Landscape details have a big impact on timetables. It takes more work to model native gardens with a variety of plant species than it does to model simple grass treatments. Realistic site presentation requires mature tree placement, garden beds, pool surrounds, and hardscaping details, but these things also make manufacturing schedules longer.
Rendering & lighting
The rendering crew sets up the cameras, applies the materials, sets up the lights, and makes high-quality renders. The first set of high-resolution renderings normally takes between three and seven days. You need more if you want to see objects from more than one aspect, have visuals that look real, or do motion.
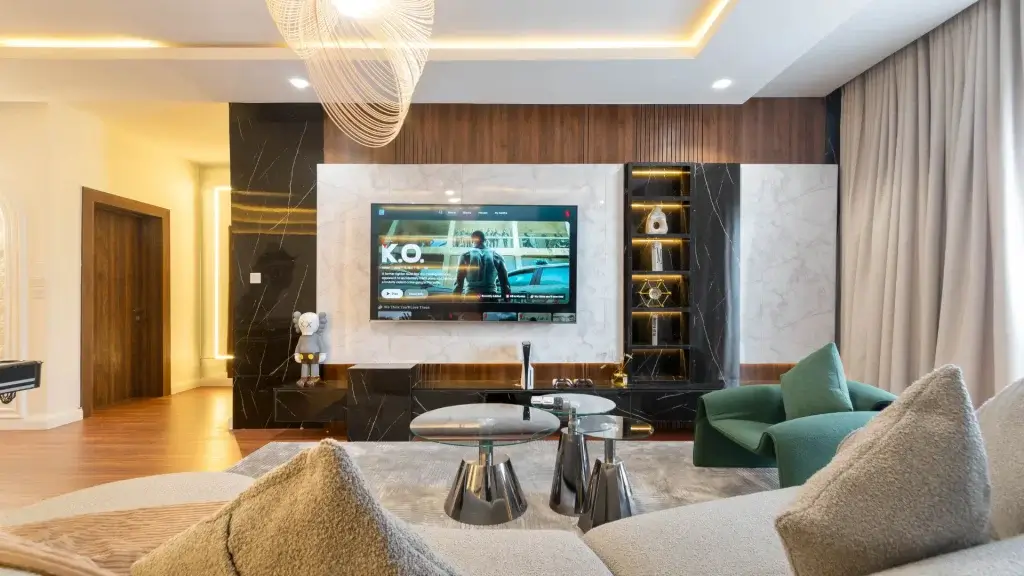
By applying hard math on the lighting, rendering makes 3D models look like photographs that look like real life. Artists set up lighting situations, such golden hour images outside, clear noon shots from above, or dramatic dusk shots that show off how well buildings are lit.
When you plan outdoor lighting, you need to think about where the sun will be based on the location and orientation of the site. Australian projects need accurate solar studies of the southern hemisphere to make sure that shadows and highlights seem real. Architectural uplighting, route illumination, and pool lighting are examples of extra lighting that can improve the ambiance and show off the lighting design.
When rendering interiors, you need to build up complicated lighting that balances natural light, artificial fixtures, and ambient light. The material’s properties have a huge effect on how the rendering turns out. When building up shaders for materials like marble or alabaster that are exceedingly reflective, see-through, or have subsurface scattering, you need to be very careful.
The amount of time it takes to render a scene depends a lot on the resolution, quality settings, and how complex the scene is. It could take anything from 2 to 8 hours to render a single 4K scene outside, depending on the technology and quality standards. Adding extra camera angles makes the computer work harder by the same amount.
You can make things better over time with progressive rendering. Before they make final high-resolution outputs, artists make lower-resolution previews to get permission for the lighting. In this way, they don’t waste time setting up lighting that needs to be replaced.
>>> Learn more about step inside 6 home design trends shaping Australia in 2026
Post-processing & delivery
For client presentations or marketing channels, the final photographs or animations are color-corrected, layered, and digitally edited to make them seem their best. The normal time frame is two to four days, depending on how many photographs there are and how many adjustments need to be made.
Post-processing converts raw renders into pictures that can be used for marketing. Artists modify the exposure, color balance, and contrast of a photo to make it look better while still looking like a real snapshot. Atmospheric effects like subtle lens flare, depth-of-field blur, or atmospheric haze can make a scene look like a movie without making the architecture less obvious.
Composite methods mix rendered buildings with photos of backgrounds, like replacing plain sky domes with beautiful clouds or sunsets. This makes the display for high-end custom homes much better.
Digital retouching resolves small issues like artifacts in the image, problems with cutting vegetation, or strange materials. The goal is still to make things look authentic instead of obviously manipulated. Changes should look real instead of made up.
The final products comprise files in a variety of formats that are suited for different tasks. For instance, high-resolution TIFFs for print materials, JPEGs that work best on the web for digital marketing, and PDFs for presentations for client meetings. It’s easier to deal with assets later on if you organize and label files correctly.
Factors that affect timeline
Several project-specific factors influence total visualisation time:
- Complexity: Custom features, big areas, or hard-to-understand sites make modeling and composition take longer.
- Information quality: When inputs are clear, complete, and correct, operations go faster. When data is missing or ambiguous, operations slow down and need more work.
- Revision rounds: Adding extra rounds of feedback or making substantial changes to the scope could add days or weeks to the lead time.
- Material Specification Detail: Generic material assignments render quickly, but individual materials that need special shader generation, like unique stone finishes, custom timber treatments, or novel facade systems, take longer to set up.
- Software and hardware capabilities: When it comes to math, GPU rendering is substantially faster than CPU rendering. AI denoising in modern rendering engines makes workflows faster than in earlier technologies.
- Output type and quantity: Still photos are faster than VR or animations. More views mean more time.
- External dependencies: If you have to wait for client preferences, designer approval, or content from a third party, the process takes longer
Planning for these things ahead of time makes delivery run more smoothly and makes predictions more accurate.

>>> Learn more about BIM for architects Australia in custom home design
Typical real-world timeline examples
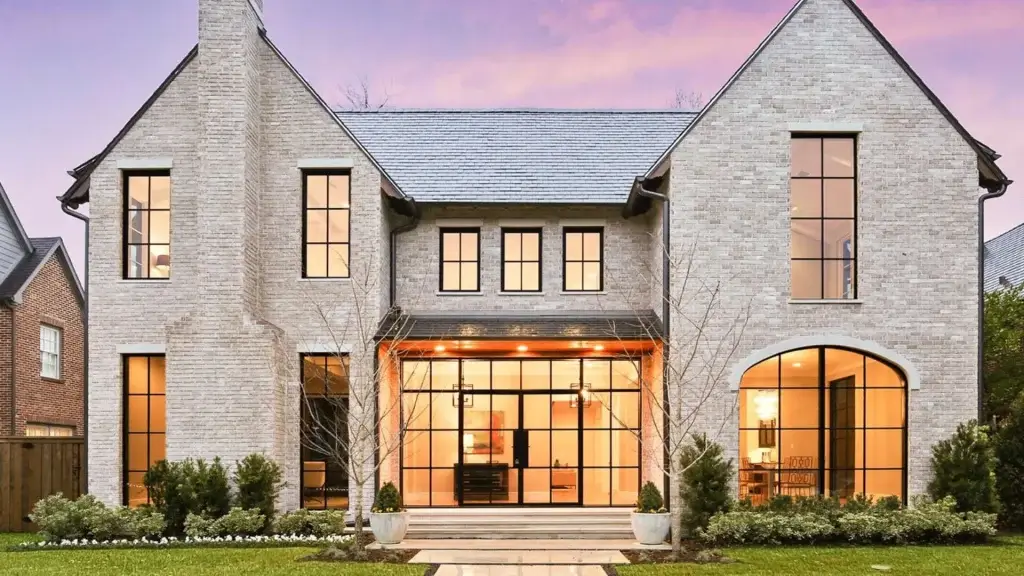
- Modest custom home (200-300m²): A small custom home will take 2–3 weeks to build and have 4–6 views from the outside with minimum landscaping effort. Good for basic architectural language and color palettes that are easy to find.
- Mid-range custom home (300-500m²): It takes 3 to 5 weeks to gather 6 to 8 views of the exterior and 3 to 4 views of the internal critical sections for a mid-range bespoke home (300–500 m²). Can do a lot of complicated design work, like custom features and complicated landscaping.
- Luxury custom home (500m²+): 5 to 8 weeks for a full visualisation suite with 10 to 12 outside viewpoints, 6 to 8 inside sections, and aerial views. It can handle complex architectural systems, bespoke details, and a lot of integration with the land.
- Fast-track project: For straightforward assignments with short review cycles, few camera angles, and common material standards, 1–2 weeks is doable. Needs all the information up front and fast approval times.
These deadlines are based on only one round of changes and all the information being submitted. When there are more changes to the design, more changes to the schedule, or delays in collecting information, schedules are pushed back.
Conclusion
The schedules for custom house visualisation depend on how complicated the project is, how good the information is, and how well the cooperation works. Setting realistic expectations, usually 2 to 8 weeks from briefing to final delivery helps with project planning and keeps marketing calendars from getting in each other’s way.
To be successful, everyone needs to be fully briefed, give comments, and be involved. Developers and architects that produce clear, detailed documentation, set explicit limits, and make the approval process easier always get things done faster without lowering the quality of the visualisation.
You can plan strategically if you know about these production realities. For example, you can start visualizing during design development instead of waiting for all the building paperwork, or you can plan phased deliveries that go along with progressive marketing strategies.
Are you ready to make a strategy for your custom house visualisation? Contact us at DX LIVING to discuss timelines, scope, and delivery strategies tailored to your project requirements and marketing objectives.
FAQ
Q: How long does a custom home visualisation timeline typically take?
A: A standard custom home visualisation timeline ranges from 2 to 8 weeks, depending on project scale, complexity, number of views, and revision cycles. Smaller homes with limited landscaping and 4–6 renders may complete in 2–3 weeks, while luxury residences with interiors, aerials, and dusk scenes can extend to 5–8 weeks.
Q: What stage of design should visualisation begin?
A: Ideally, visualisation should begin during Design Development (DD) rather than waiting for full construction documentation. Early engagement allows marketing, planning submissions, and stakeholder presentations to run in parallel with technical design refinement.
Q: What factors most commonly delay a visualisation project?
A: Delays are typically caused by:
Incomplete or unclear documentation
Late material selections
Multiple design revisions
Slow client approval cycles
Scope changes mid-production
Clear briefing and consolidated data significantly shorten the custom home visualisation timeline.
Q: Is BIM required for architectural visualisation?
A: BIM is not mandatory, but it improves efficiency and accuracy. Providing coordinated BIM models reduces geometry errors, improves material mapping, and accelerates clash resolution before rendering. It also strengthens alignment between architects, engineers, and visualisation teams.
Q: How many revision rounds are included in a typical visualisation process?
A: Most professional workflows include 1–2 structured revision rounds. Additional revision cycles, especially those involving design changes rather than visual adjustments, can extend the timeline by several days or weeks.
References
1. Link
2. Link
3. Link
4. Link
5. Link
6. Link
7. Link
Related Articles
Custom Home Builders vs Project Builders: Which offers better long-term value?
For most Australians, building a home is the largest financial commitment they will ever make. Choosing between custom home builders and project or volume builders is therefore not just a…
Read MoreHow to identify quality home builders (and avoid costly mistakes)
Why choosing the right builder matters Building a home is one of the most significant financial and emotional commitments most people will ever make. The builder you choose affects the…
Read MoreHow to compare the best home builders Adelaide before you sign
Building a home is one of the most significant financial commitments most people will ever make. In Adelaide, the difference between a well-managed build and a costly dispute often comes…
Read More